The Animation Editor lets you move and rotate your characters' body parts like an action figure into unique poses at different keyframes of an animation. Studio then automatically creates keyframes in between those poses that flow together to make your characters appear as if they're moving.
In this chapter, let's explore how to open the Animation Editor, customize your settings to help with posing your character, and create an animation with two unique poses that Studio flows together to make it look like the character is swimming in water.
Open Animation Editor
The Animation Editor is Studio's primary animation tool. While it comes with a lot of functionality, such as animation capture and inverse kinematics tools, this lesson focuses on its basic tools to help you get started in learning how to create animations.
- At the top of the toolbar, go to the Avatar tab.
- Click the Clip Editor button. The Animation Editor displays at the bottom of Studio.
Prepare rig
The Animation Editor requires a rig, or poseable figure, to create character animations because rigs include the internal structure you need to move and rotate body parts into different poses. While you can create your own rigs or access several pre-built rigs through the Rig Generator tool, this lesson provides a rig on top of the pedestal in the game.

To prepare your rig:
Select the Figure rig on top of the pedestal. The part names that make up the rig's body parts display in the Animation Editor.

In the toolbar, find the snapping tools and make sure Rotate and Move are not checked.

Using the camera controls, move the camera to get a good view of the part you want to animate. While moving, hold Shift to slow down camera movements.
Action Control Move W A S D Rotate Hold the right mouse button to rotate around the selected object. Zoom Use your mouse's scroll wheel. Focus Press F to focus on a the selected object.


Create first pose
Now that the Animation Editor is open and your rig preparation is complete, it's time to start posing your character for the first pose of your animation. This lesson focuses on a swimming animation, but feel free to adjust the learnings for your own poses. Depending on the animation you want to create, your first pose may be very different.


To create your first pose for a swimming animation:
Back in the toolbar, select the Rotate tool, then click on the rig's LeftUpperArm. A set of handles display around the body part.

Click and drag the handles to rotate the rig's left arm, and note how each handle rotates the arm in a different direction. You can undo any change by pressing either CtrlZ or ⌘Z, depending on your computer.
Rotate different body parts until your first pose is complete. Make sure to change the camera angle as you're working so that you can see the pose from multiple points of view.

Duplicate keyframes
Before you begin your second pose, let's take a moment to duplicate your first pose at the end of your animation. This process ensures that your animation repeats smoothly as it loops.
To move your first pose to the end of the animation, you need to move the scrubber that marks the current keyframe position to the end of the timeline. The timeline is the numbered line at the top of the Animation Editor that represents your animation in seconds.


To duplicate your first pose's keyframes to the end of the animation:
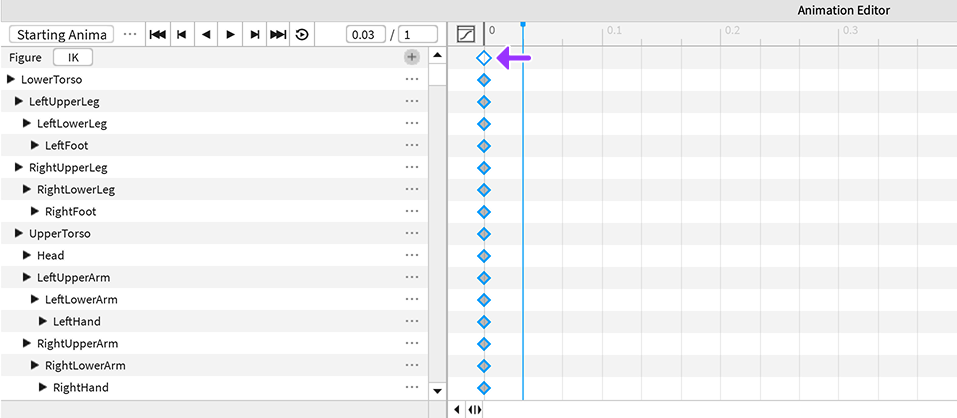
In the Animation Editor, click on the white diamond at the top of the timeline. This diamond represents every body part's rotational data for your first pose at 0:00 on the timeline. Note that the white diamond displays with a blue border when you have done this step correctly.
Copy the first pose by pressing CtrlC or ⌘C, depending on your computer.
Click the scrubber, then drag it to the end of the animation at 1:00 on the timeline.
Paste your first pose at this new timeline position by pressing CtrlV or ⌘V, depending on your computer. A new set of diamonds display at the end keyframe.

To loop the animation, click the Loop icon. Your animation will now repeat seamlessly.


Create second pose
Using the same process as earlier in the lesson, it's time to create your second pose! After you design this unique pose, Studio will automatically create keyframes in between those poses that flow together to make your characters appear as if they're swimming.
To create your second pose for a swimming animation:
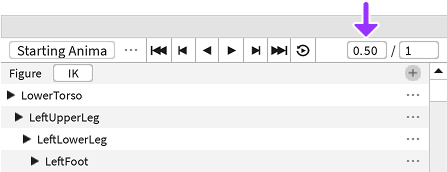
Set the scrubber in the middle of the animation. You can either drag the scrubber to roughly be in the middle of the timeline, or you can manually set it to 0.5 in the position indicator to the left of the timeline.
With the Rotate tool still active, rotate different body parts until your second pose is complete. Remember to change the camera angle as you're working so that you can see the pose from multiple points of view.
In the Animation Editor, click the Play button to test your animation. Feel free to make adjustments to either of your poses until it looks like the character is smoothly swimming in water.

Congratulations on posing your character for your first animation! The next lesson details how to save and export your animation so that you can use it within games.